Being in a new kitchen makes me want to try lots of new things. A couple items on my list for trying soon are homemade fermented condiments and sprouting grains. I am not going to lie, fermenting and canning foods scares me a little bit as I feel like so much can go wrong. However, I know how beneficial (and delicious) fermented foods can be and I also love the idea of preserving the plentiful fruits and vegetables for the winter months, so I wanted to dip my toe into this area. Before I jumped right in, I thought I would make some refrigerator pickles which do not require fermenting and canning, but is a baby step in that direction. When I saw small pickling cucumbers at the farmers market, I knew my time had come. I looked up a few recipes online and then just went with it! I found a vinegar to water ratio of 5:3 when no sugar was used so I stuck with that, adding in whatever spices and seasonings I deemed appropriate. This was the result, spicy dill and garlic pickles.
Spicy Dill and Garlic Pickles
Makes 1 Jar
2.5 cups vinegar
1.5 cup water
2.5 tbsp coarse salt
3/4 pint pickling pickles, sliced into quarters
1/2 chili pepper sliced
5 garlic cloves, sliced
1.5 tsp dried dill (best to use fresh, put whole sprigs into jar)
1/2 tsp peppercorns
1. In a pot, combine vinegar and water and bring to a boil. remove from heat and stir in salt to dissolve.
2. Allow the vinegar mixture to cool for 5 min while you put the cucumbers, garlic, chili peppers and spices into the jar. It is best to put the spices at the bottom of the jar and then top with the cucumbers.
 |
| I would put the dill at the bottom next time. I would also use fresh if I had it. |
3. Pour the slightly cooled vinegar mixture over top of the cucumbers. Lightly put on lid and allow to cool to room temperature. The lid may seal slightly while cooling, unseal the lid before refrigerating.
4. Once at room temperature, transfer to the fridge to chill for 3 days.
 |
| Before |
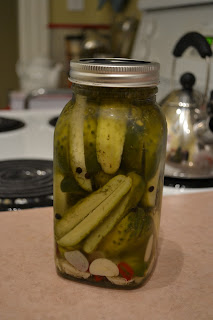 |
| 4 days later |
These pickles were crisp, tangy and just a little spicy. I may add some red chili flakes into the mix next time. These pickles are for true tangy pickle lovers, but sugar can always be added if a sweeter variety is preferred.
These pickles were really easy to make and just take a little forethought. I popped them in the fridge while I went away for the weekend, and came home to some delicious pickles. These should last in the fridge 7-10 days, and may just become a staple in my house. Pickling cucumbers can be substituted with sliced english cucumbers or other crisp vegetables. The possibilities are endless!
Next on my path to fermenting and canning: homemade chili sauce. Don't hold your breath though...


